

How To Fix Color On Painted Waell Projector
How should I pigment my wall to make it into a projector screen? Your favorite digital activities volition come to life depending on the type of paint yous utilize for a projector screen. Picking the best color from Pigment on Screen is what I would advise.
Utilize these projection wall painting suggestions for the all-time viewing in your home theater.
Which Paint Colour Works Best For Projector Screens?
Selecting the appropriate paint color is a crucial stride earlier making your decision, rather than going out and blindly buying the pigment that Projector Central suggests.
Four factors will primarily influence the paint color choice.
The Effulgence Of The Projector
A white screen volition reflect more light than a black or greyness screen, that much should be obvious. A gray projector screen is not an option if your projector is unable to produce vivid enough light.
For these projectors, yous'll need a white projector screen with a lot of gain and so it tin can bounciness dorsum enough light to keep the image from looking washed out or slow.
On the other manus, if your projector is powerful plenty to put out more than 3000 lumens of light, you can choose between a white or grayness screen depending on the other two factors listed beneath.
By the way, if you're looking for the ideal dwelling theater projector which fits your budget, you can check outmy favorite ones.
The major review websites are not always accurate, I can say with certainty after testing out so many projectors. And then, I recommend you checkmy top recommended projectorsif you're in the hunt of buying i.
Personal Preference
Personal preference comes next in the analysis. An image on a white projector screen will have excellent color reproduction and vibrancy but poor black visibility.
On the other hand, a gray projector screen will display blacks very well and have a better contrast ratio, just the colors and vibrance of the image will be on the paler side.
White would therefore exist your preferred colour if you prefer to run across images that are more vivid and colorful. A gray projector screen would be ideal if you prefer to view displays with improve and deeper blacks.
Ambient Light
The colour of the screen paint you choose to employ on the wall backside your projector will largely depend on how much ambient light is present in the space.
To ensure that plenty calorie-free is reflected from the projector screen surface in a room with a lot of ambience low-cal seeping in through windows or doors, you will need a white paint that is reflective.
Still, you have the choice to choose gray, which is less reflective, if your light-controlled space is relatively nighttime.
Less reflective surfaces have the do good of having less lite reflecting off of the walls and ceilings. A better cinematic experience will issue from doing this, which volition make the room darker while watching a movie.
Will You Oft View 3d Content?
The tint of the 3D glasses causes the image to appear darker than usual when viewing 3D movies. As a result, your projector screen needs to exist more cogitating since 3D movies will require more gain.
White screen paint is therefore the best selection if yous plan to watch a lot of 3D movies.
Recommended Products
There are other colors besides white and gray that can be used for a projector screen. A silver screen is another choice, which would combine the benefits and drawbacks of white and gray screens.
The products that I would suggest for the various colors of projector screen paint are listed below, based on my own experience and research:-
- For White Projector Screens, I would recommend theDigital Paradigm Ultra White Screen Paint (check price on Amazon).
- For Grayness Projector Screens, thisScreen Pigment (on Amazon) is recommended.
- For Silver Screens, I recommend thePaint on Screen S1 (bank check on One of the tiptop brands of projector screen paints is Paint on Screen (available on Amazon). You lot can encounter why past visiting their website.
How Should You Prepare Your Walls Before Painting?
A quick, simple, and professional fashion to engage a client without spending a lot of coin on an expensive screen is to projection movies, slideshows, or PowerPoint presentations onto an empty wall in your office. You must first prepare and paint your wall before using it equally a screen so that the images volition be visible without any glare, imperfections, or distractions.
- Check the wall for cracks or other flaws. Any nails that might nevertheless be there and obstruct the path should be taken out. Use a sanding sponge to brand the surface smooth.
- Embrace whatever holes, ridges, or bumps in the wall with putty. With the aid of a putty knife, shine out any flaws.
- To serve as a reference, project a flick onto the wall. The location of the screen on the wall should exist measured and planned. Marker the wall with a ruler, a pencil, and painter's tape to ensure that the dimensions are straight and the right proportions.
- Use a layer of primer to the wall expanse enclosed past the painter's record. Primer dries at different rates, and so give it fourth dimension to dry out. Check to meet if the wall is dry out to the touch past feeling it or by post-obit the instructions on the can.
- Staying within the lines of the tape, apply two coats of matte white or calorie-free-grayness paint to the portion of the wall you desire to utilize equally a screen. In between coats, let the paint dry out. Permit the wall dry for the night after you're washed.
- Accept the painter'southward record off. Create a border for your wall screen by applying screen Flok tape to the wall using a ruler.
How Do Yous Paint Your Wall For The Projector Screen?
Information technology is now fourth dimension to paint that wall since y'all take chosen the color and make of the pigment yous will employ for your projector screen. Here is a brief video showing the procedure.
Projection Screen Painting Procedure In Less Than 3 Minutes
Spotter this video on YouTube.
Beneath is a listing of the step-by-step process:-
Select The Wall
Non just any wall can be used in your house. You demand to locate a wall that is big enough to accommodate the size of your screen while notwithstanding leaving some space around the edges. Brand sure the wall tin accommodate a multifariousness of displayed images because dissimilar input sources will have varying epitome display sizes.
Prep The Wall
In one case you lot've called your wall, you need to clean it and look for flaws similar texture from previous paint jobs and bumps. The all-time strategy for completing this job is to make the room equally nighttime every bit you lot can and so browse the wall face with a light pointed along it for any raised areas.
Fifty-fifty out raised portions of the wall using light sandpaper. Though a little tedious, this step will help remove epitome distortions similar the one that makes everyone'south confront appear to accept a massive mole on it.
Once the wall is level, clean it with soapy water or a mild detergent to remove any remaining dust and debris so that your new paint will adhere properly and evenly.
Determine The Projector Screen Area
Marking the expanse where the image will exist projected would be the next step. To do this, plow off all of the room's lights, turn on the projector, and centre the prototype on a wall.
Afterwards you have inverse the image'south size, mark the projected area'southward edges with a pencil.
Apply Masking Record To Marking The Borders Of The Screen Area
The next step would be to utilise painter's record to seal off the edges after marking the projector screen area's perimeter. The utilise of painter'southward record will guarantee that the painted area is both almost rectangular and contained within the predetermined space.
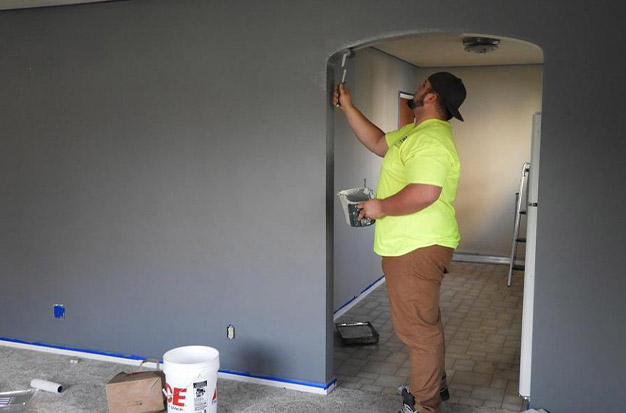
Apply The Paint
In guild to prevent lumps from forming while painting, yous will need to exist extremely careful. Consider seeking professional assist. An alternative to a roller is a spray gun.
In between the areas that the painter's tape has delineated, begin gradually applying the paint. For best results, you'll demand between 2 and three coats of paint.
Remove The Painters Tape And Employ A Screen Border
Thus, you already have a painted and prepared projector screen. The projector screen border is now the only matter left. Naturally, yous could build a frame out of wood strips, just I would suggest the Velvet Project Screen Edge Tape (look on Amazon). To mark the edge of the projector screen, take off the painter's tape and affix the velvet tape directly to the wall.
Conclusion
To enjoy watching movies to their fullest, a good projector screen is a necessity. Painting the wall is a good, affordable pick, only caution must be taken with the type and color of paint used.
I've done my best to share what I've learned from my own experience besides as from the research I've done by reading forums and articles online. I hope I was able to give you the necessary details about the pigment types that are appropriate for a projector-screen wall.

How To Fix Color On Painted Waell Projector,
Source: https://www.iprojecter.com/how-do-i-paint-a-wall-for-a-projector-screen/
Posted by: edwardsloges1978.blogspot.com
0 Response to "How To Fix Color On Painted Waell Projector"
Post a Comment